| Sistemul Audio de pe Masina Mea Sistemul Audio de pe Masina Mea |
 03-09-10, 20:10
|
#16
|
 Stage 2 Stage 2
Join Date: Sep 2010
Posts: 26
|
 Re: BERYLLIUM BMW 323ci
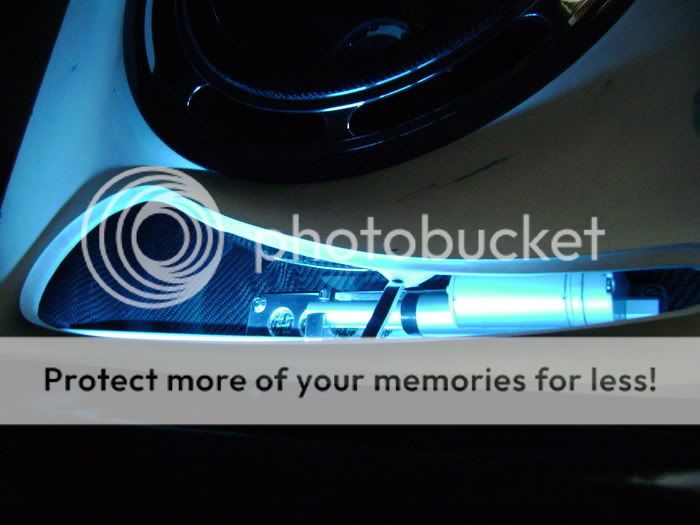
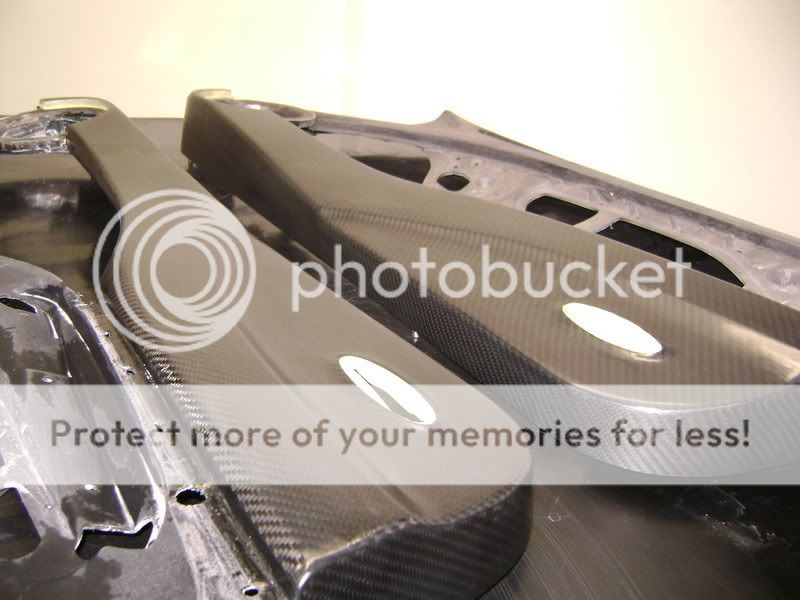
The grill is almost complete. for now, no Focal Logo's anymore
althought...
The next work on the list is for next days, maybe weeks.
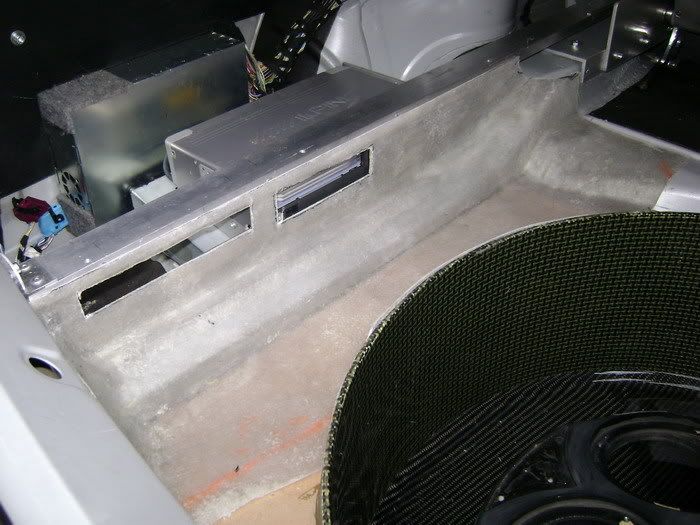
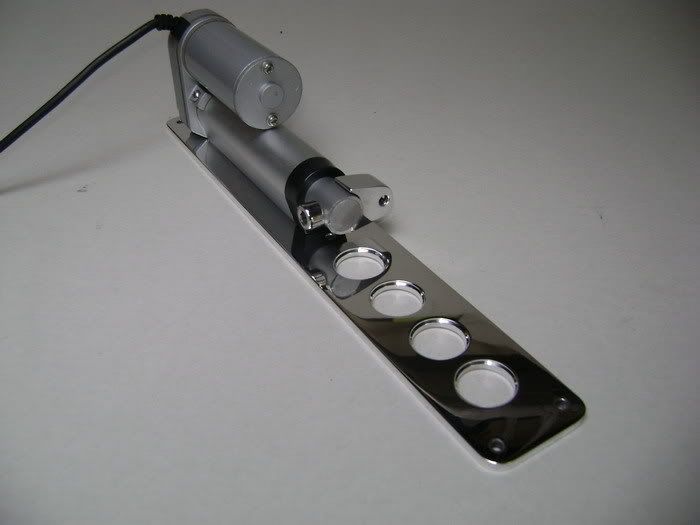
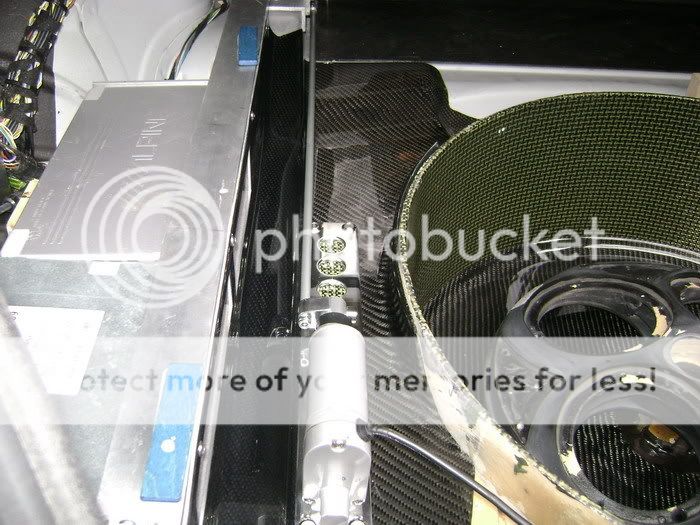
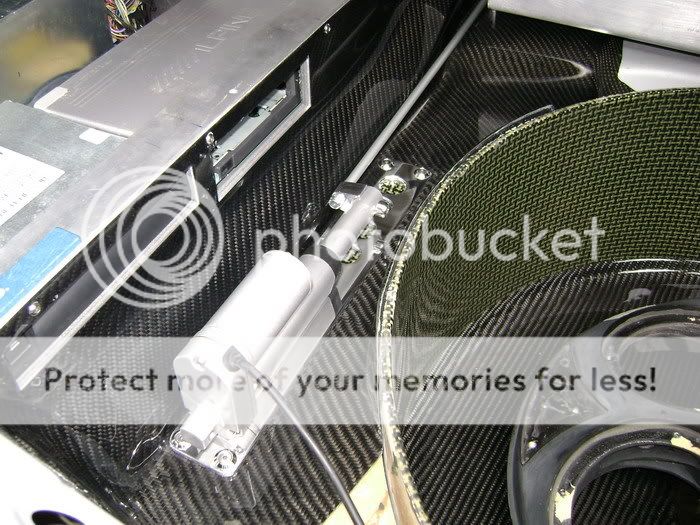
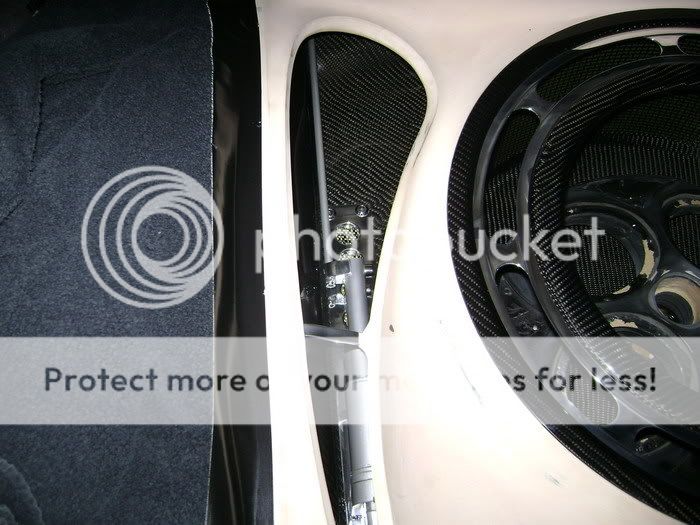
The actuator, that bringt the amplifier to life, will get a nice place.
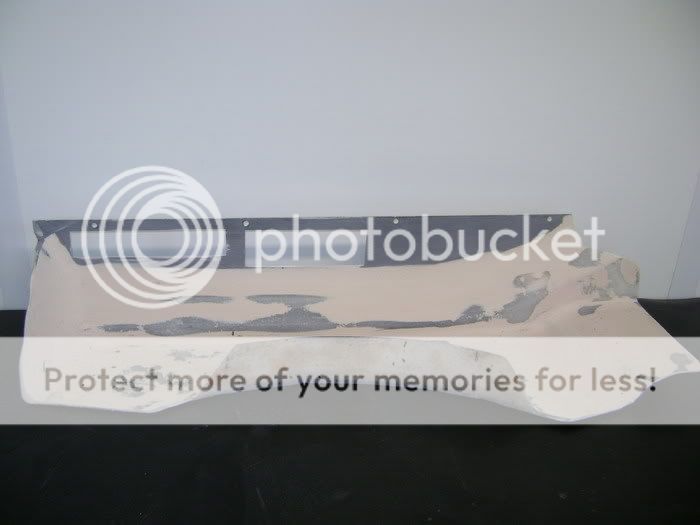
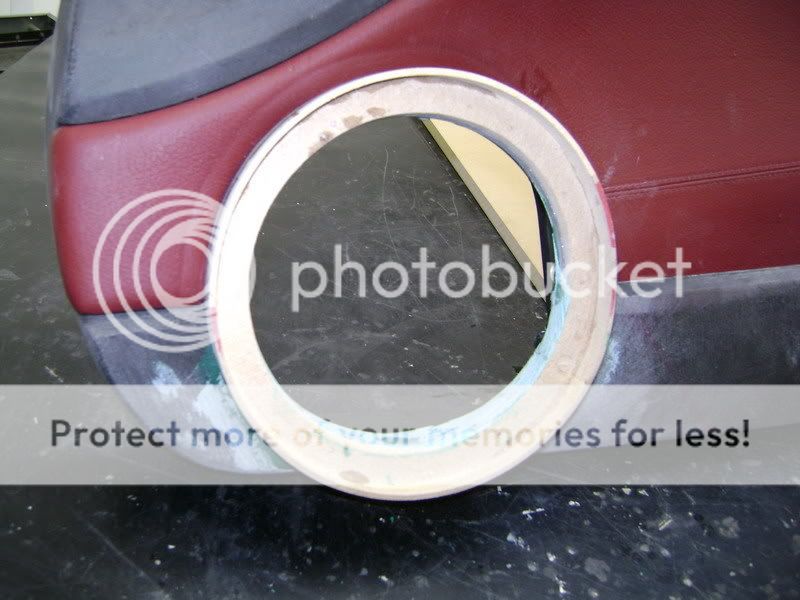
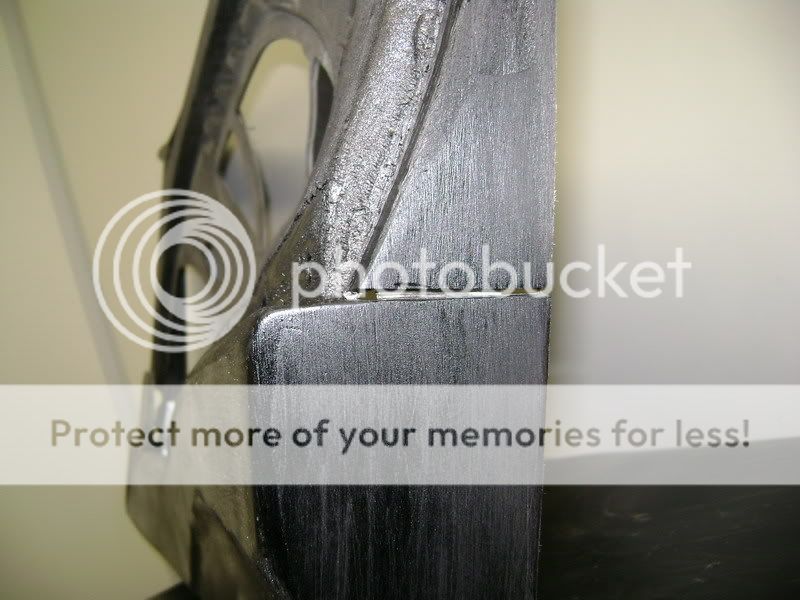
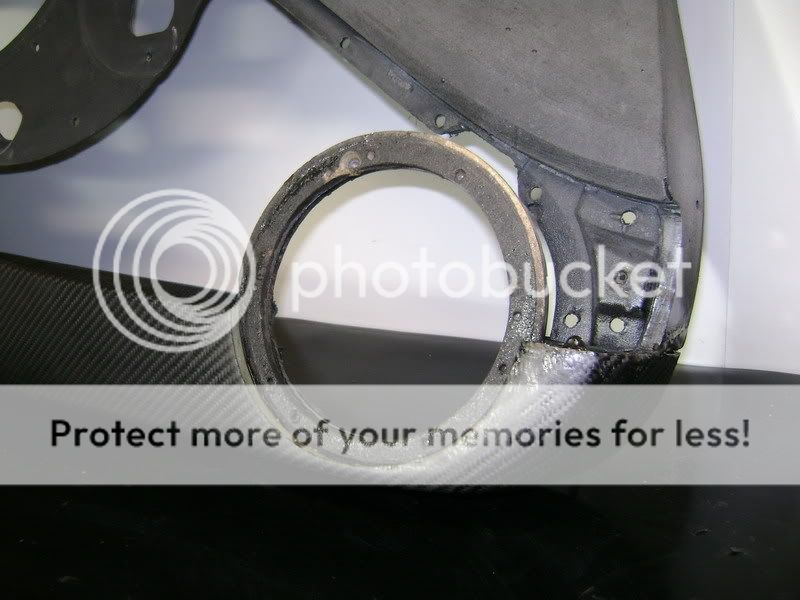
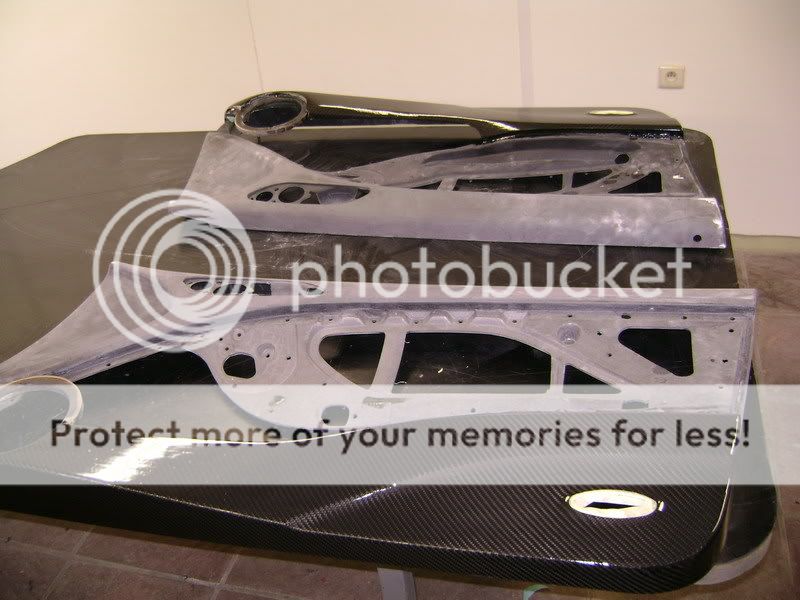
For those who forgot, this is how the motor was placed.
This was only to see if the thing worked like I wanted.
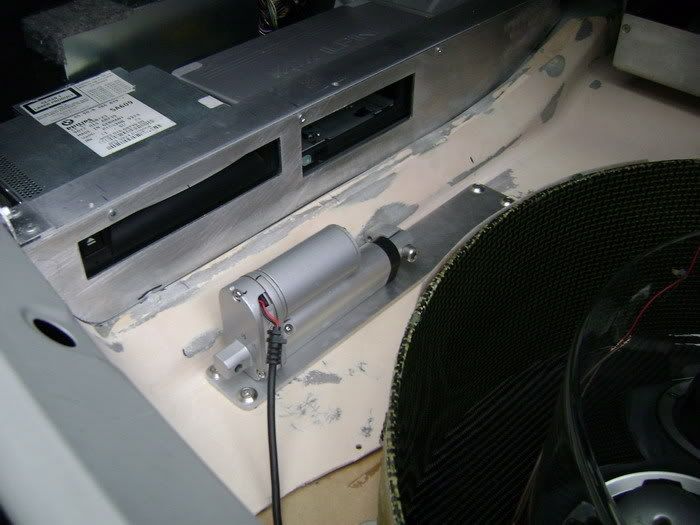
The meaning is, if you take the left carbon piece away, you see the motor and the cd-changer. If I wanted to show this, it must be made SHOWABLE
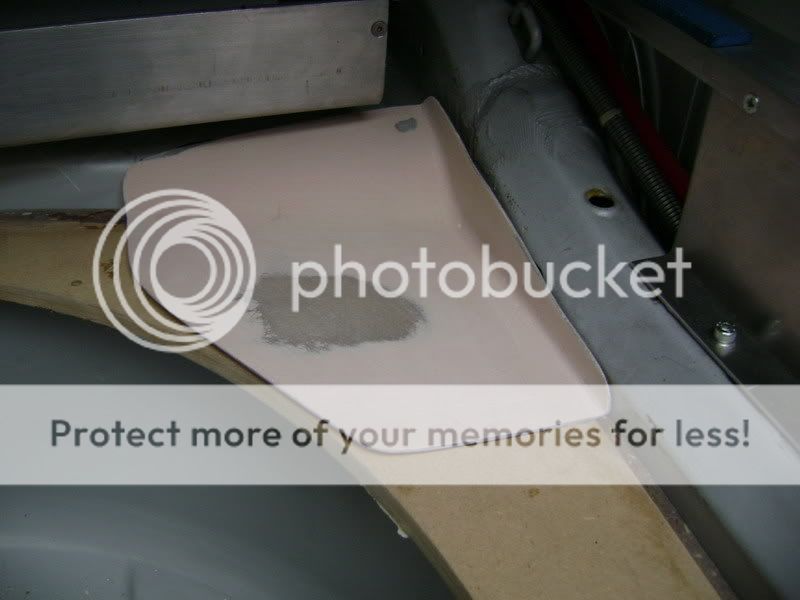
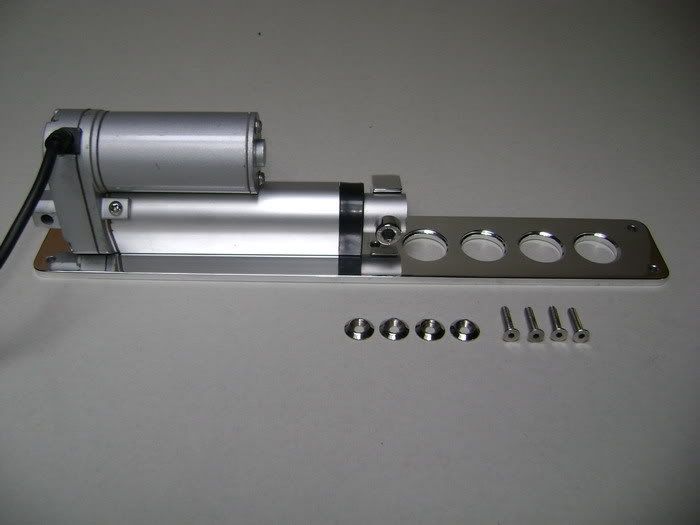
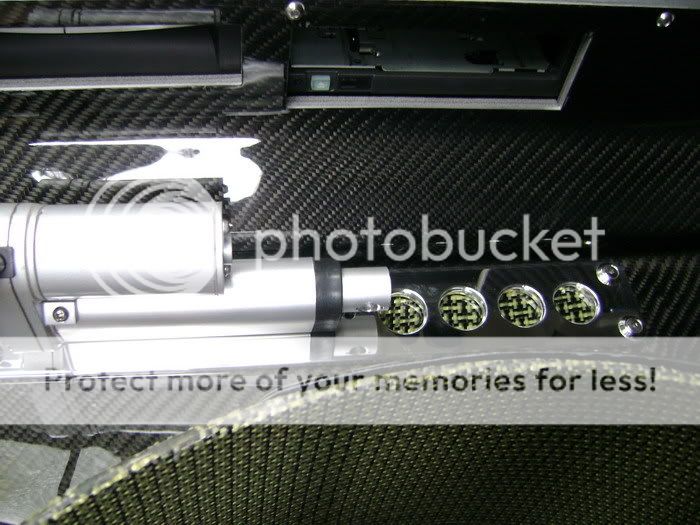
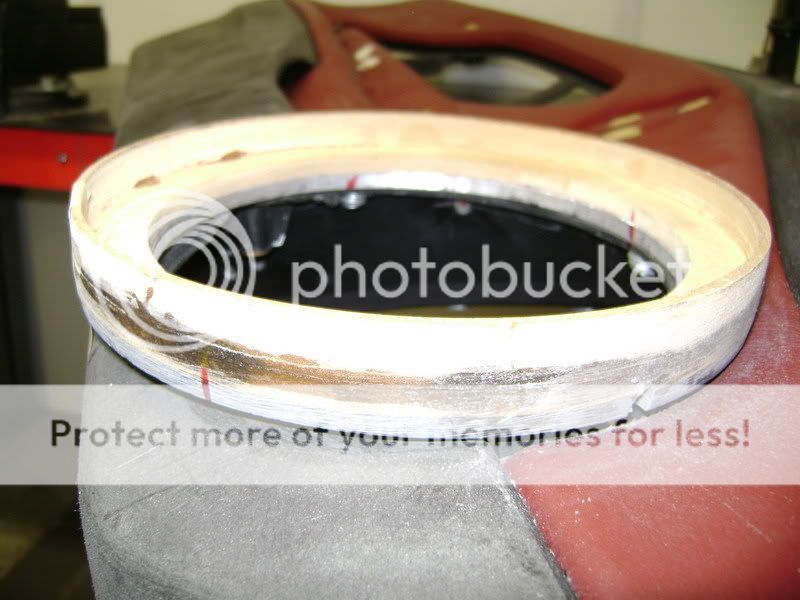
Then, I put the actuartor on a alu plate of 4mm thick.
The fiberglassed part where the motor will be put on tight, is as good as ready.
I sprayed this black. Those who read all thread, now what that means .
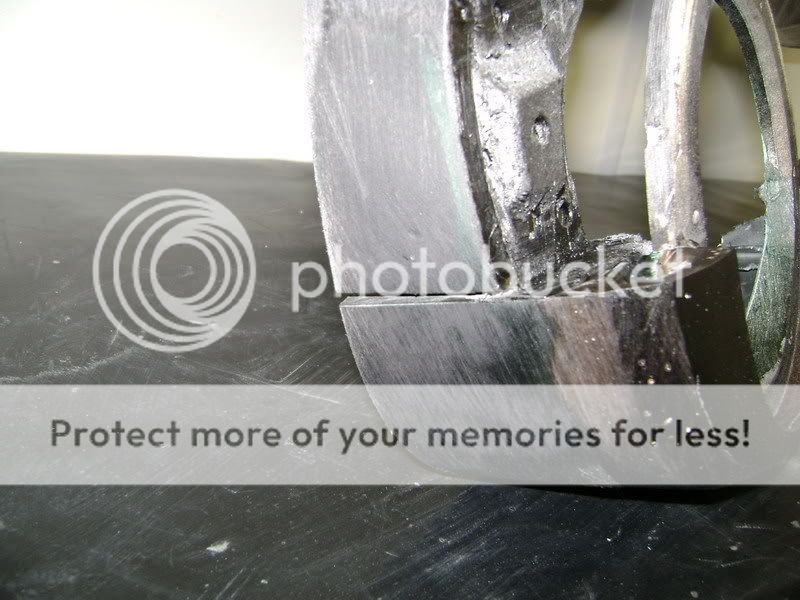
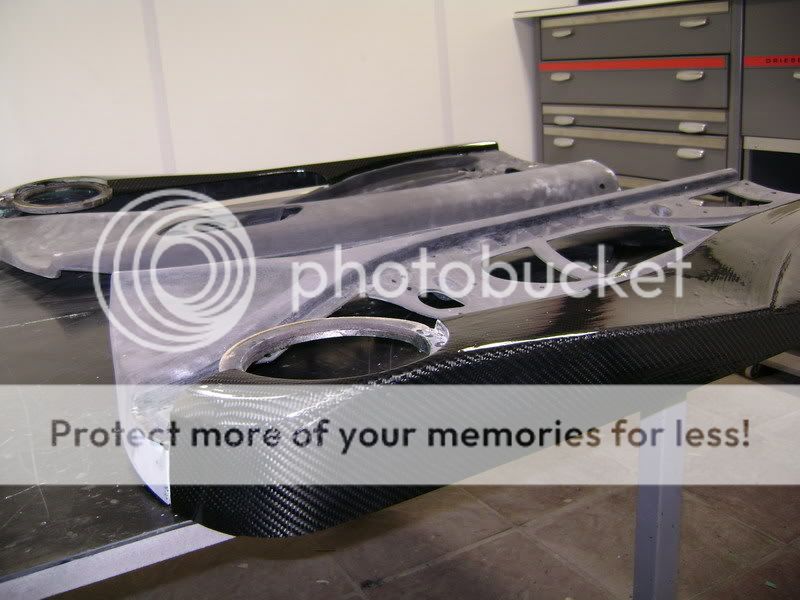
This will be the alu plated where the motor will locked on.
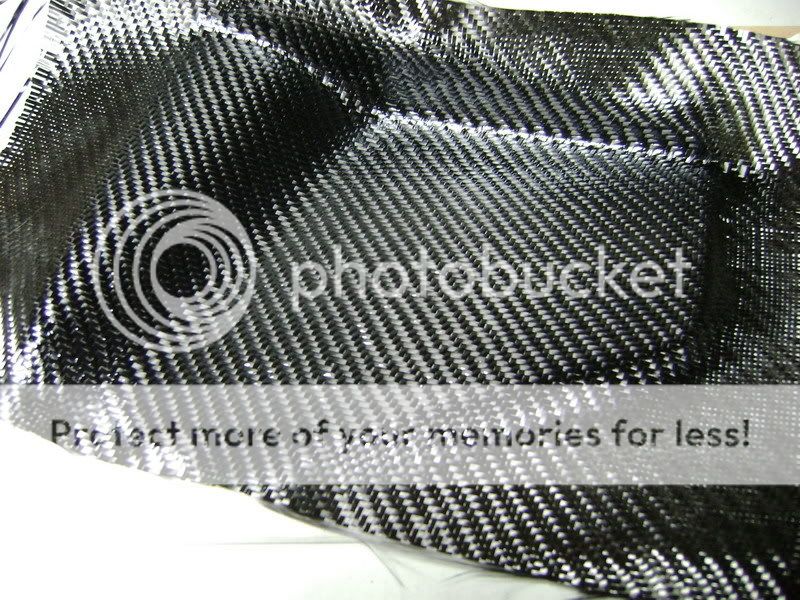
As you can see, I made 4 big wholes in it. Under these, put a carbonkevlar plate. The look will be a little bit better I think.
Also you can see I made a alu piece with M5 screws. Here will be a "bar" in connection with the amp.
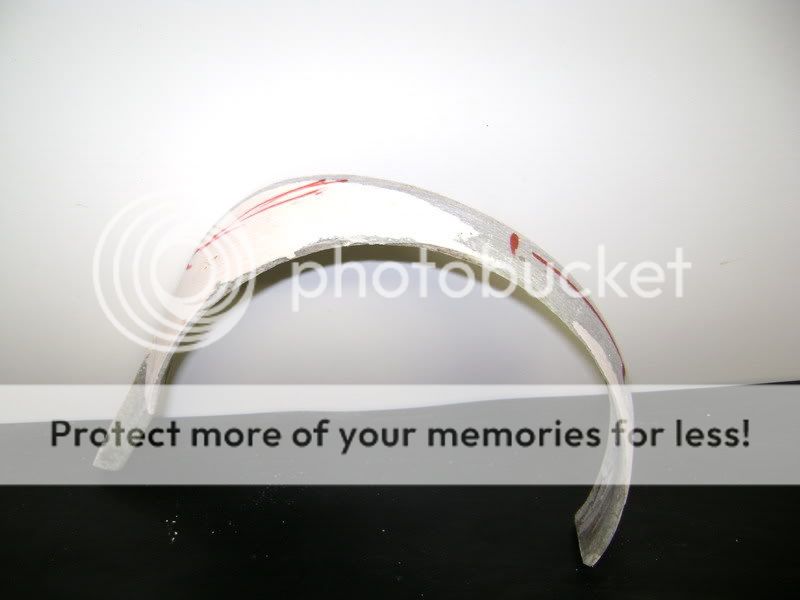
I took everything on a trip to polish-land.
The fiberglass part that comes under the motor, is already covered in a layer of carbon... needs some more epoxy.
Not simple to cover it in carbon, but it worked.
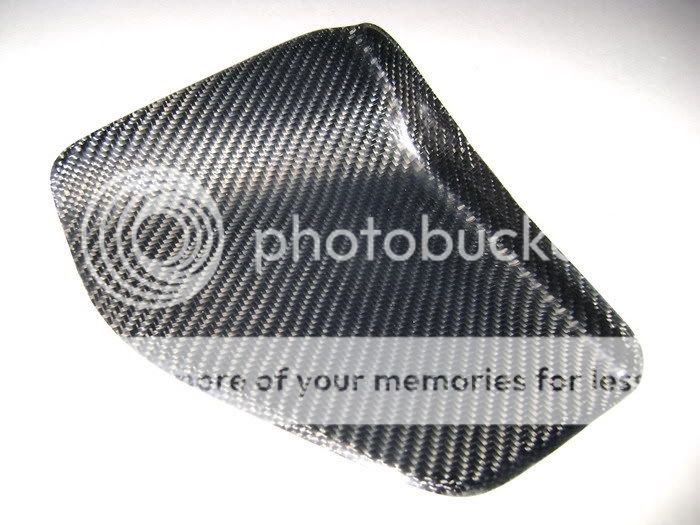
Couple of layers of epoxy are needed, and then rubb the whole piece, while working on the sides..
Damn, this piece looks great, but you're not going to see much of it .
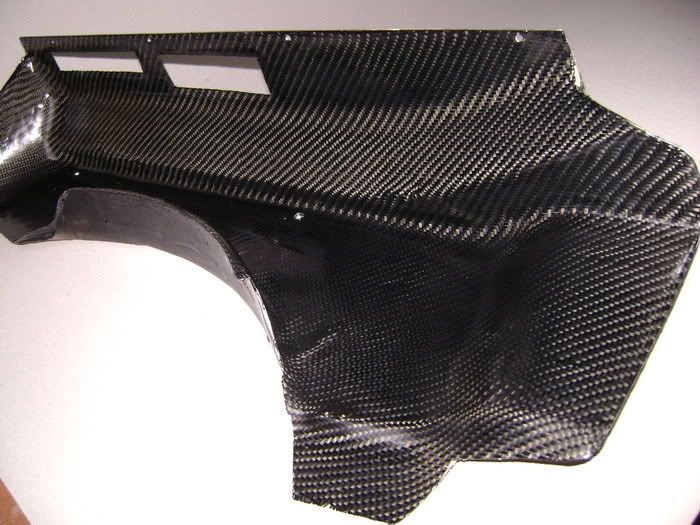
The CF piece, to put the motor on is ready... I did some long long long rubbing, but it was worth the effort.
|

|

|
|
03-09-10, 20:15
|
#17
|
Stage 2
Join Date: Sep 2010
Posts: 26
|
Re: BERYLLIUM BMW 323ci
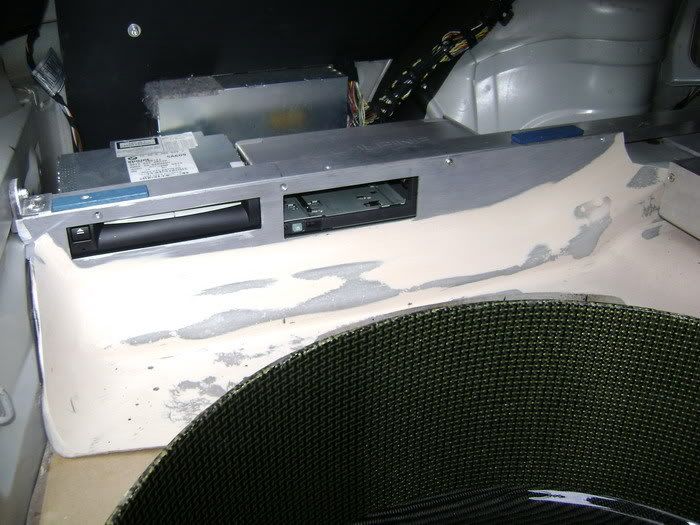
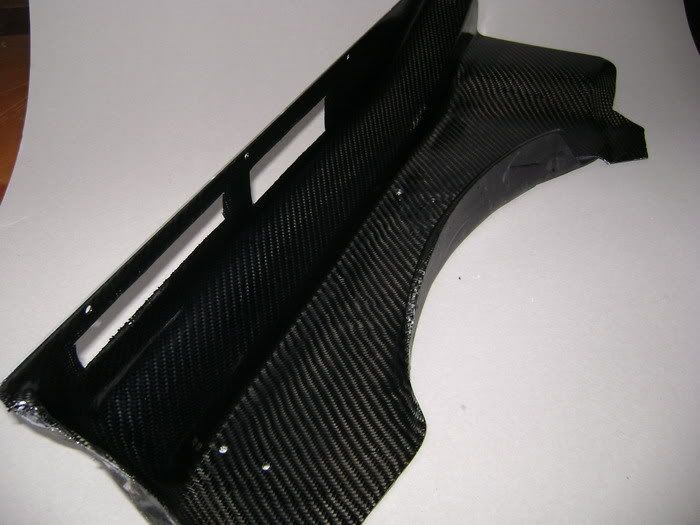
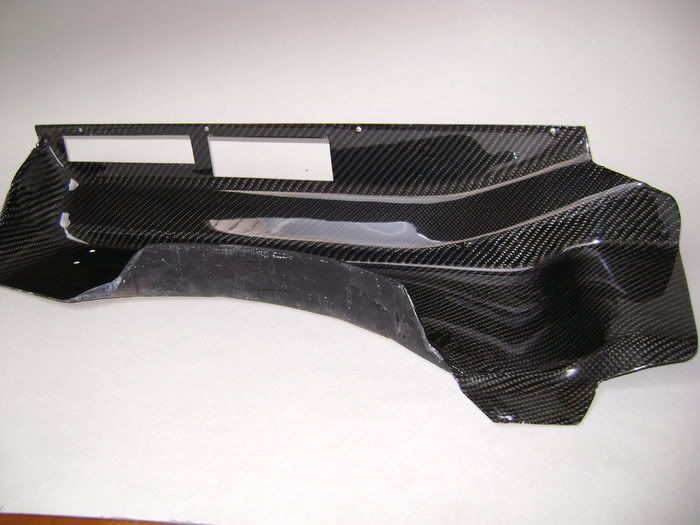
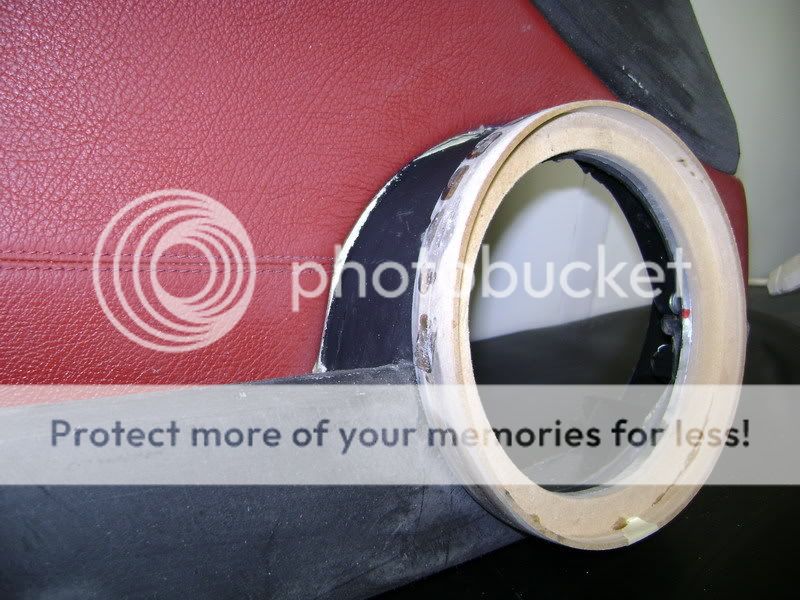
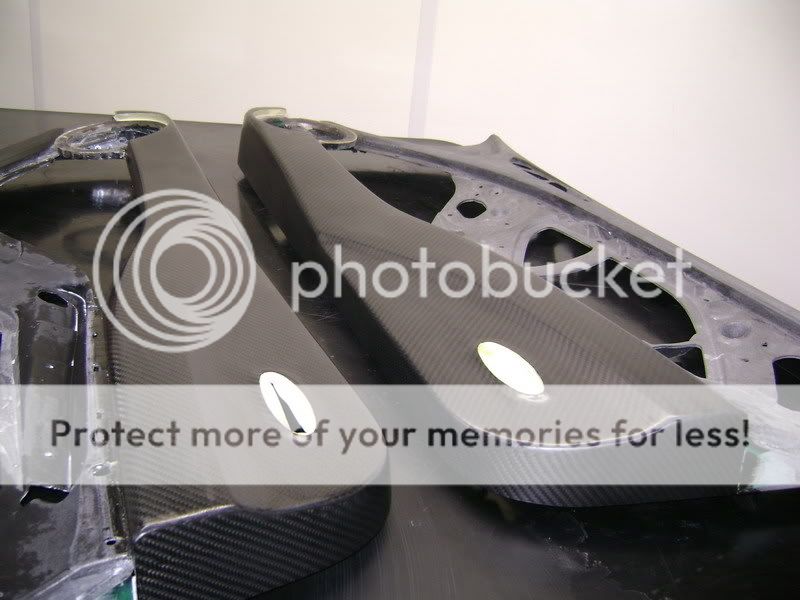
This is how the motor is beeing placed; You can see I put an little alu cover over the bar from the motor, not easy to find...
This is the same material as where the engine is screwed on.
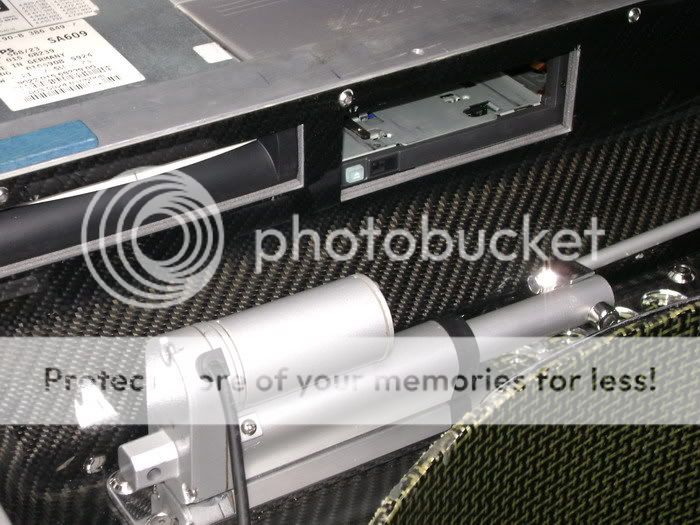
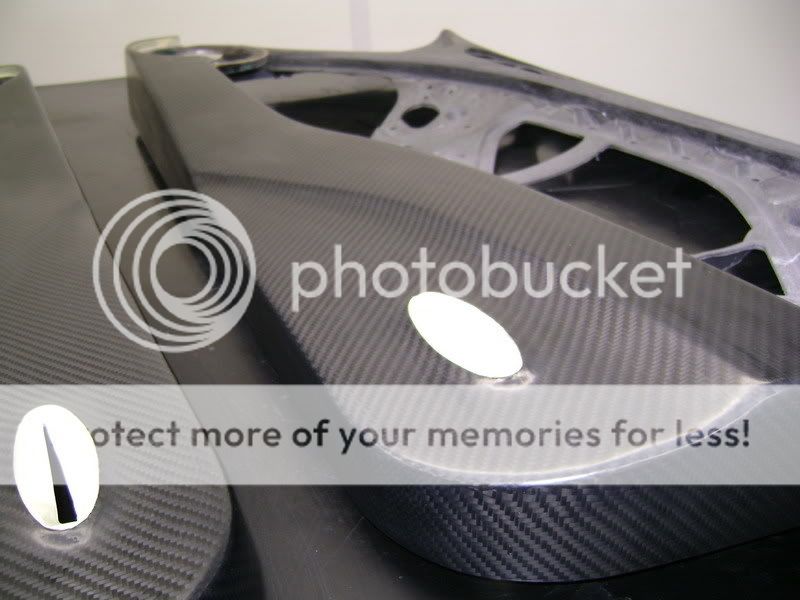
Made an extra piece of carbonkevlar to fill in the big wholes on the bottom of the motor.
A little more contrast with the CF.
The picture is taken when you're standing right behing the trunk. Now you can see it all.
|
|
|
|
|
03-09-10, 20:17
|
#19
|
Stage 2
Join Date: Sep 2010
Posts: 26
|
Re: BERYLLIUM BMW 323ci
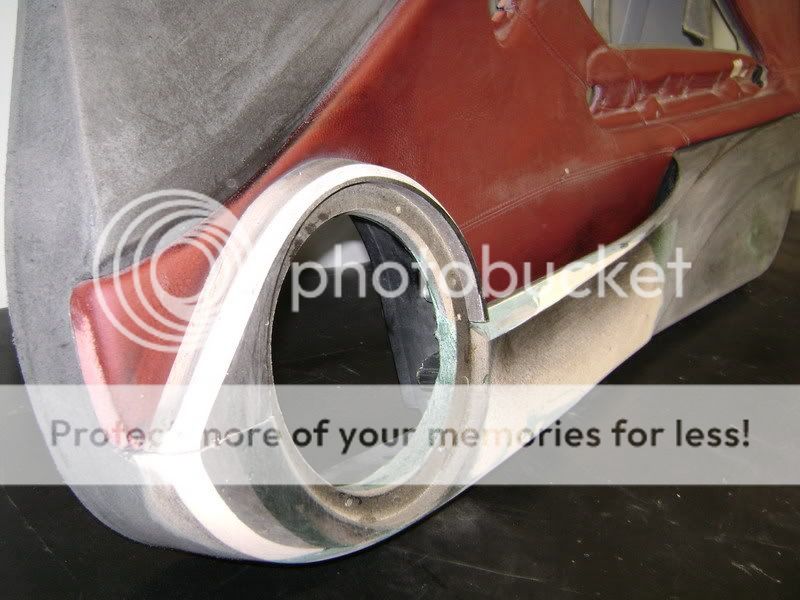
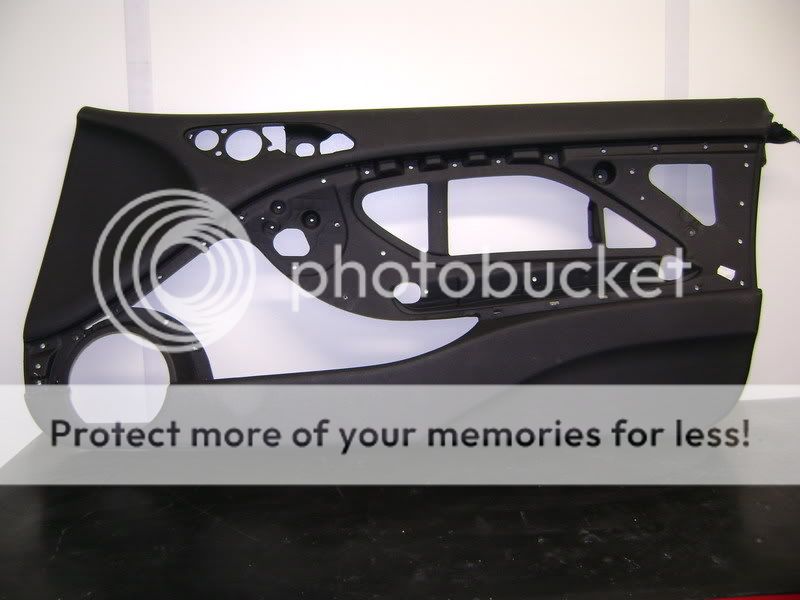
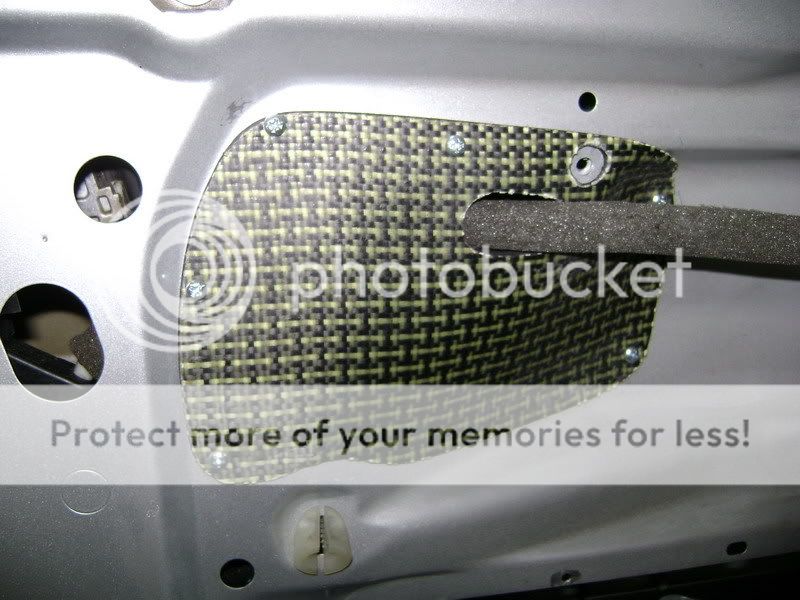
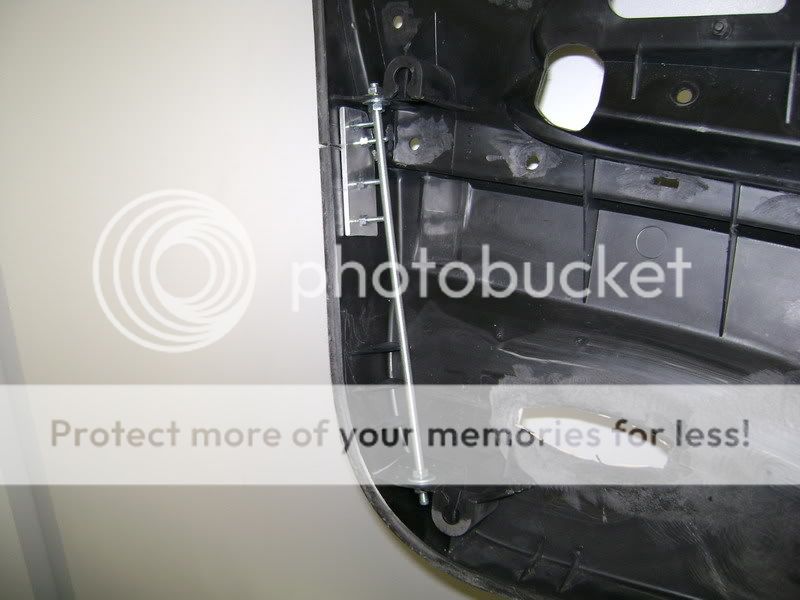
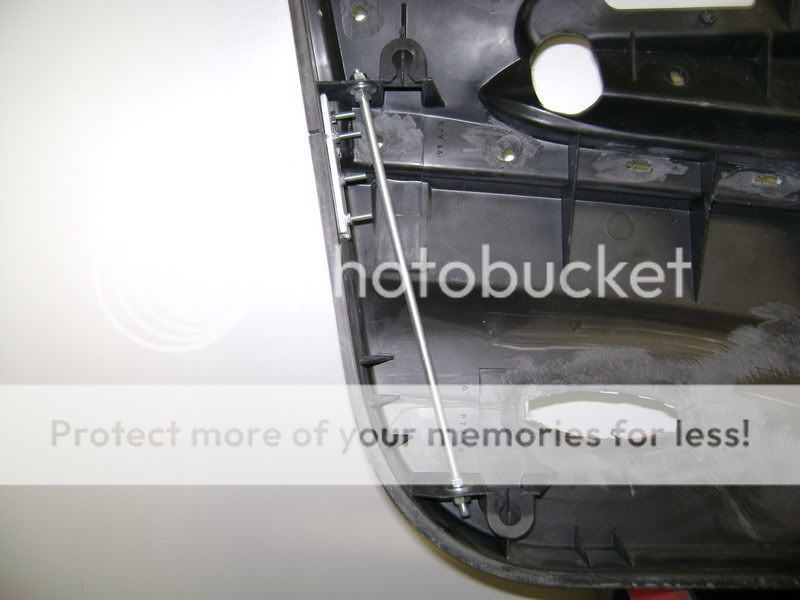
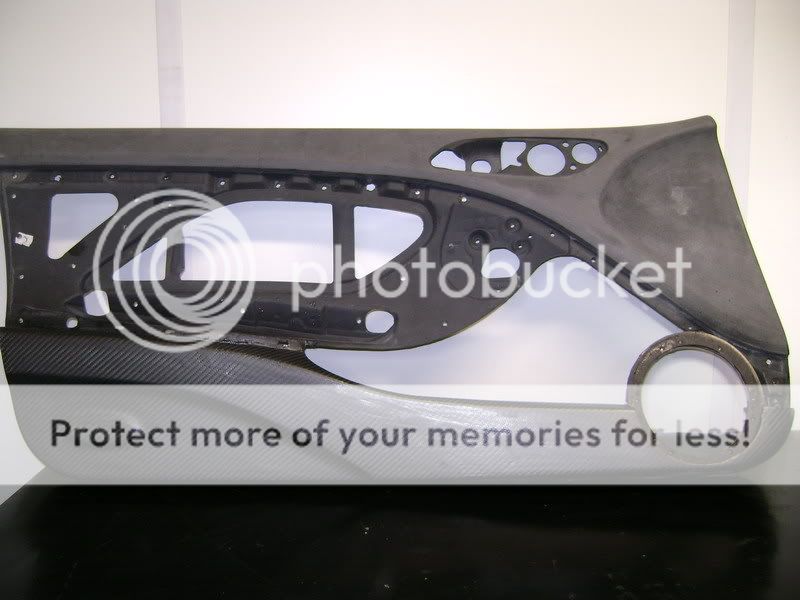
I'ts time to rebuild the doorpanels.
The doorpanels i using are secondhanded. So the car remains complete, and I doesn't have to drive without panels all winter.
Demounted some stuff.
Started taking off the leather. awefull job
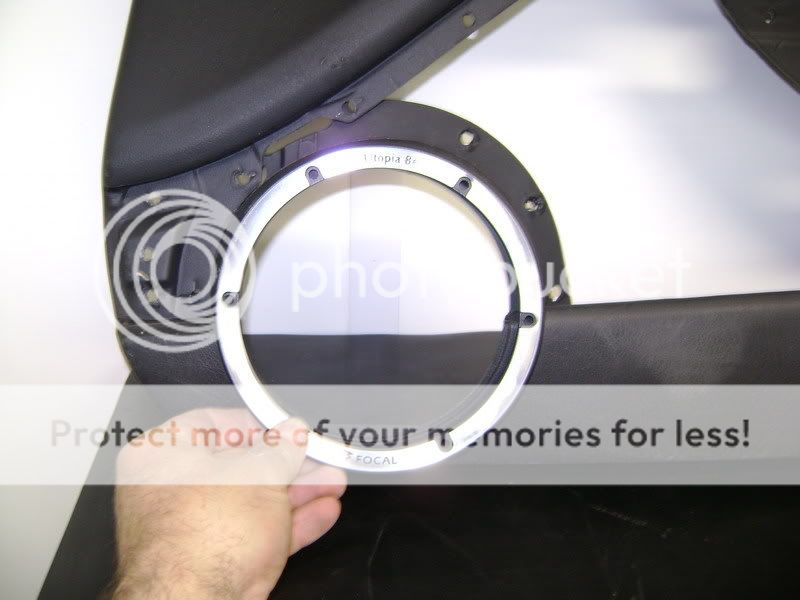
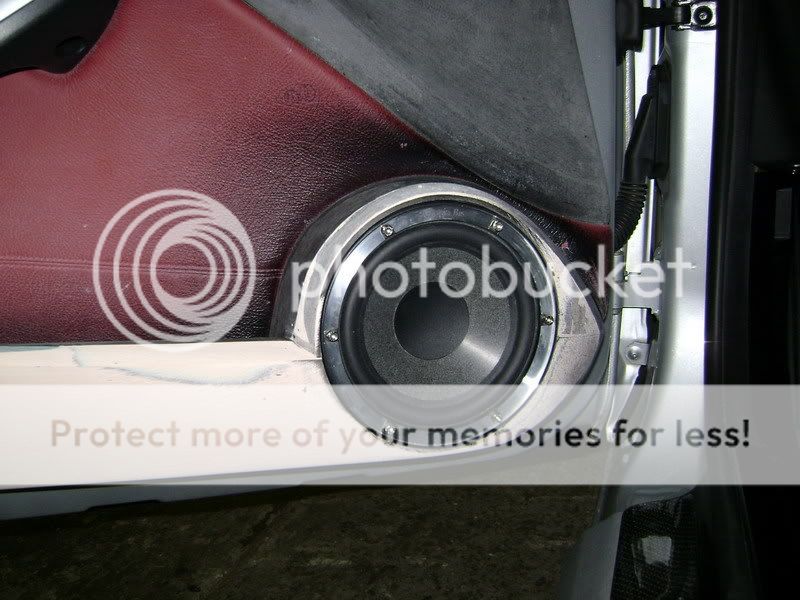
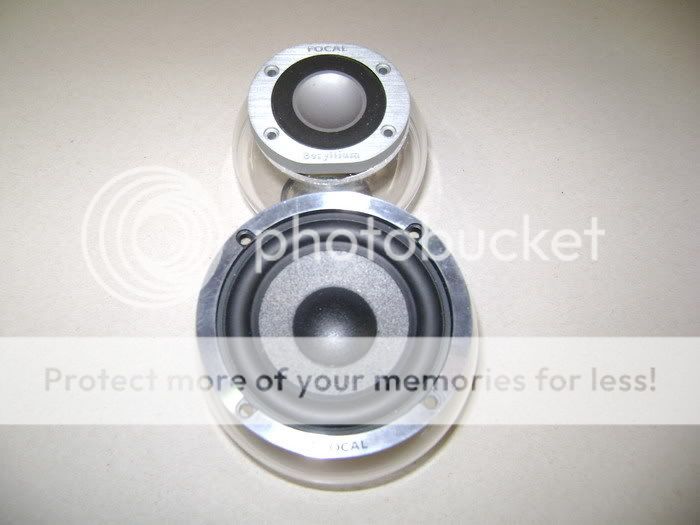
The 16cm FOCAL speaker is taking approximately the same place where the original speak is.
In the meanwhile , I let the rings mild nicely.
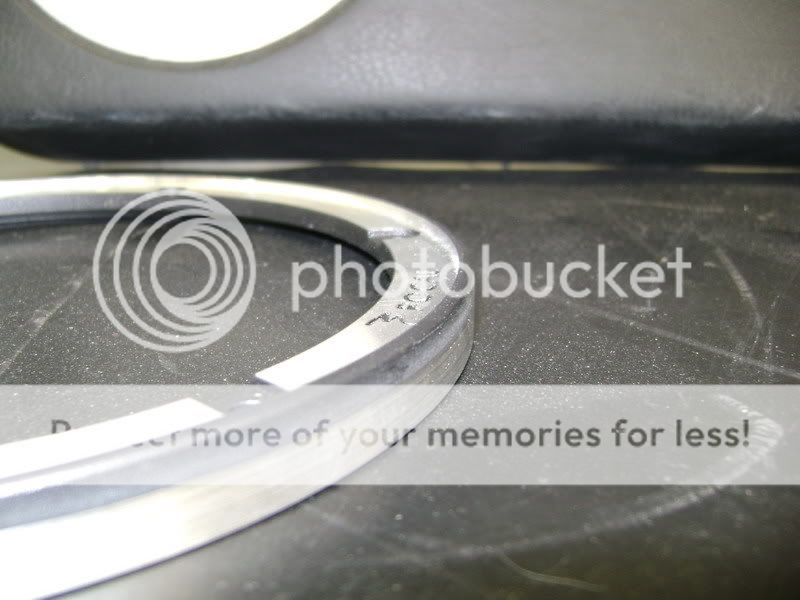
I milded some MDF wooden rings to tighten on the doorpanel.
To lock the speakers tight I made a extra alu plate of 6mm thick.
Here I can use the screws that came with the FOCALS. These are special screws that click-in the grill.
This is an seperate little cap that goes on top. This model will be editted more.
This will come nice when it's finished.
|
|
|
|
|
03-09-10, 20:18
|
#21
|
Stage 2
Join Date: Sep 2010
Posts: 26
|
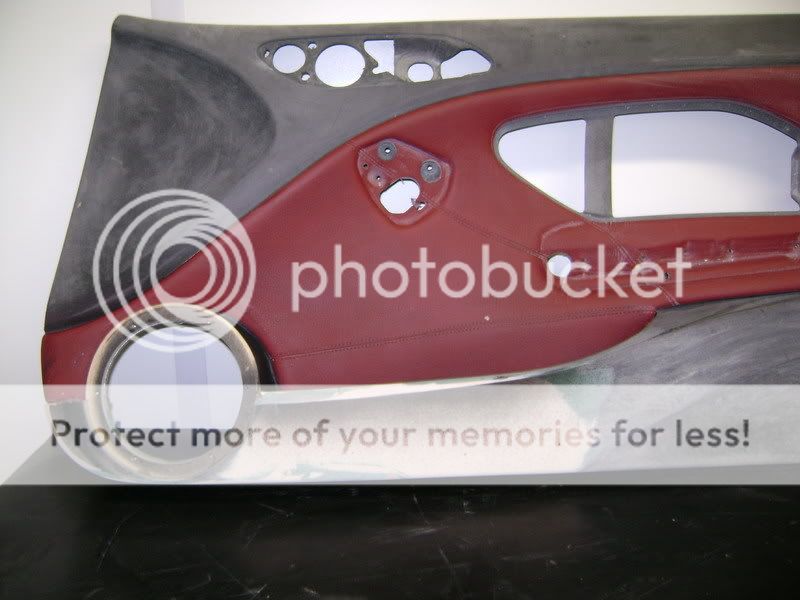
Re: BERYLLIUM BMW 323ci
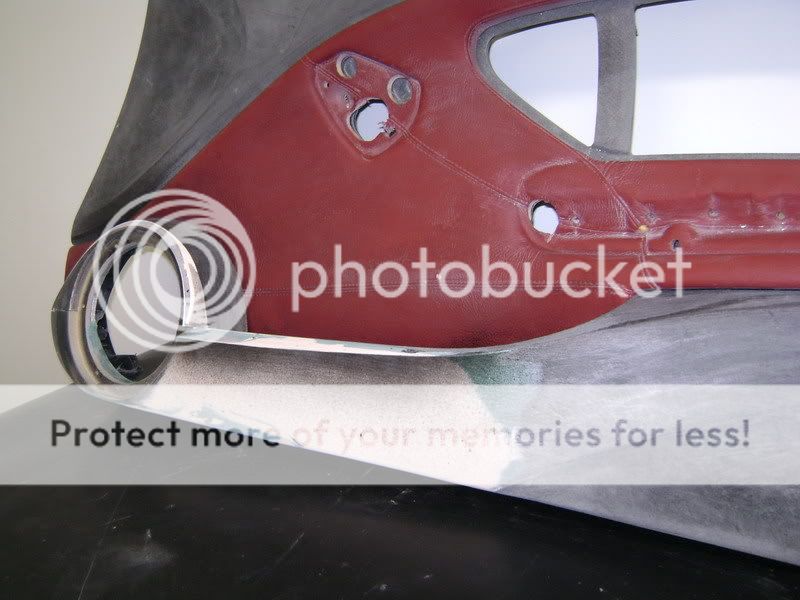
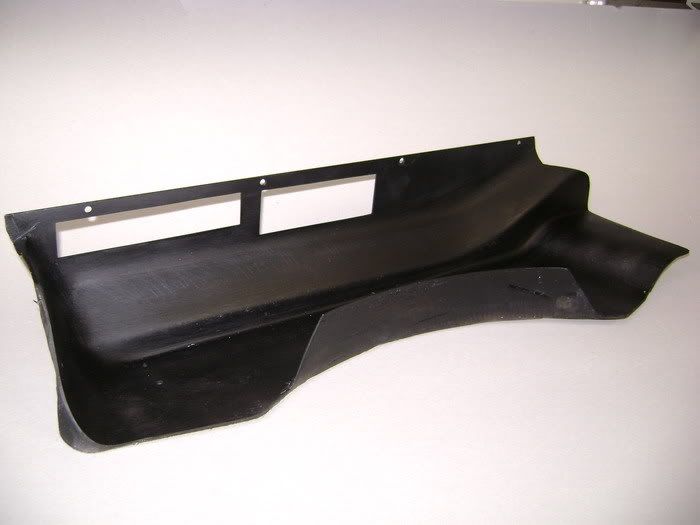
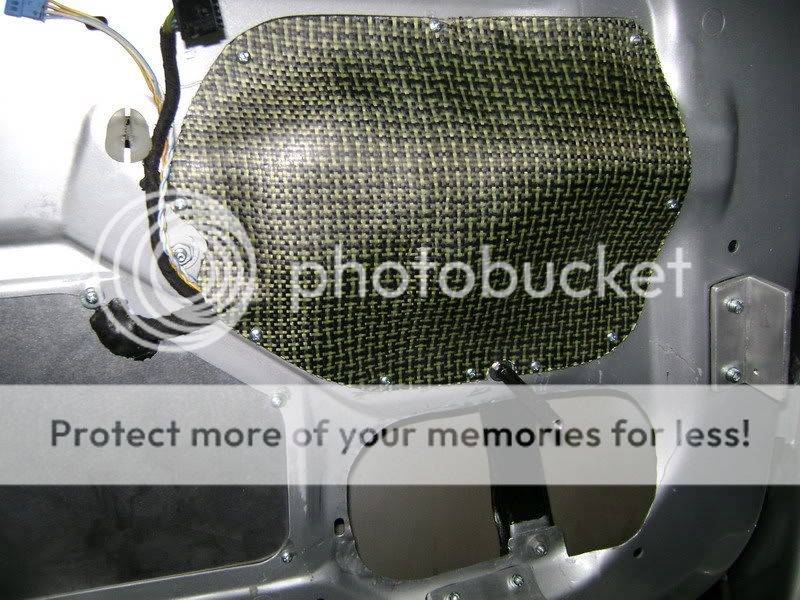
Here a couple of pics of the original doorpanel, to compare more easy.


And this is what it's going to be. The door, on the speaker, gained 2cm more to the inside of the car. This is what I had to do to get the speaker in there in a good way.
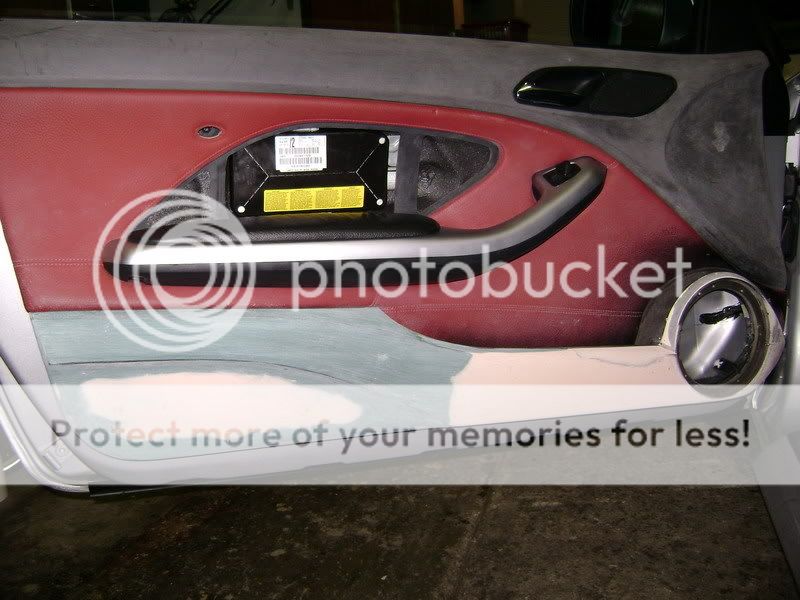


The seperate polyester cap, that goes over the speaker, will come in silver, like the trim.
This will contrast with the rest.

Picture with the grill.
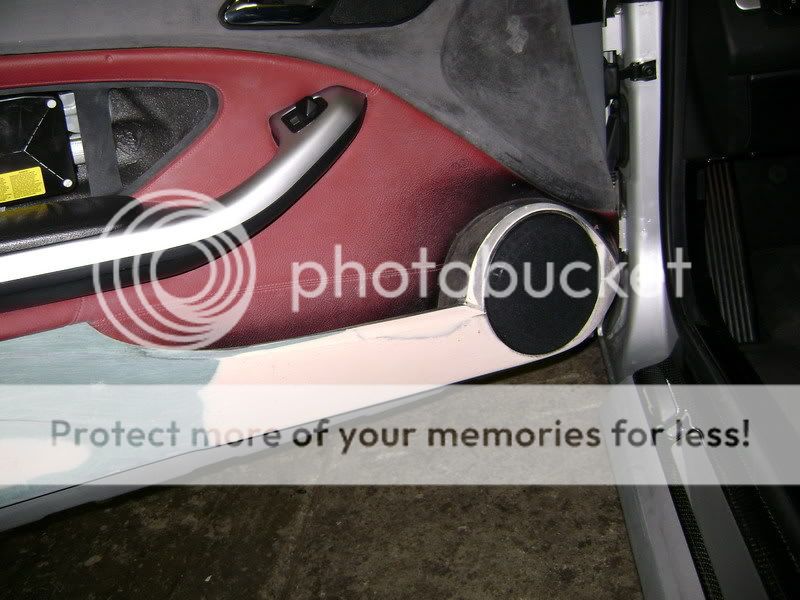
If I look at this all, I think it doesn't contrast to much with the lines, shape of the original panel.
Has to be rubbed and finished some more.
On the backside of the panel, maybe there will come a little light, that shines when the door is opened. Partially to fill up the big piece.
|
|
|
|
|
03-09-10, 20:18
|
#22
|
Stage 2
Join Date: Sep 2010
Posts: 26
|
Re: BERYLLIUM BMW 323ci
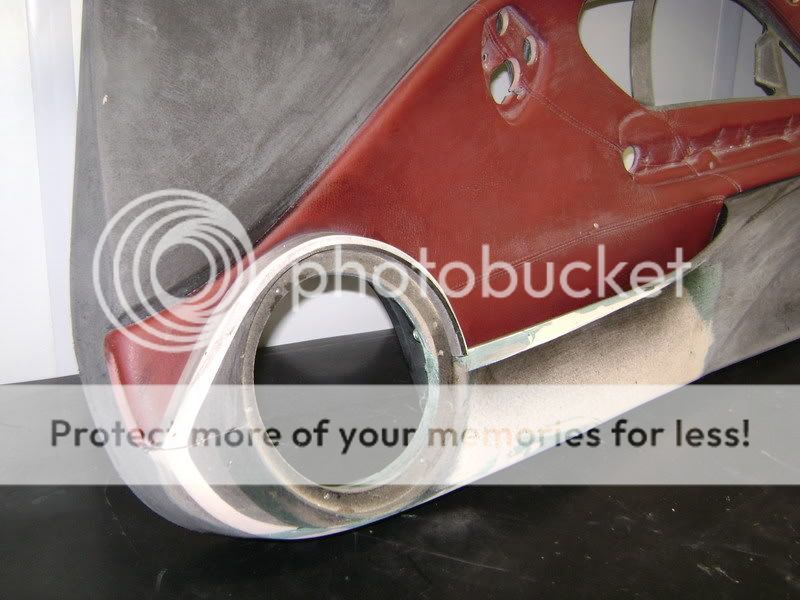
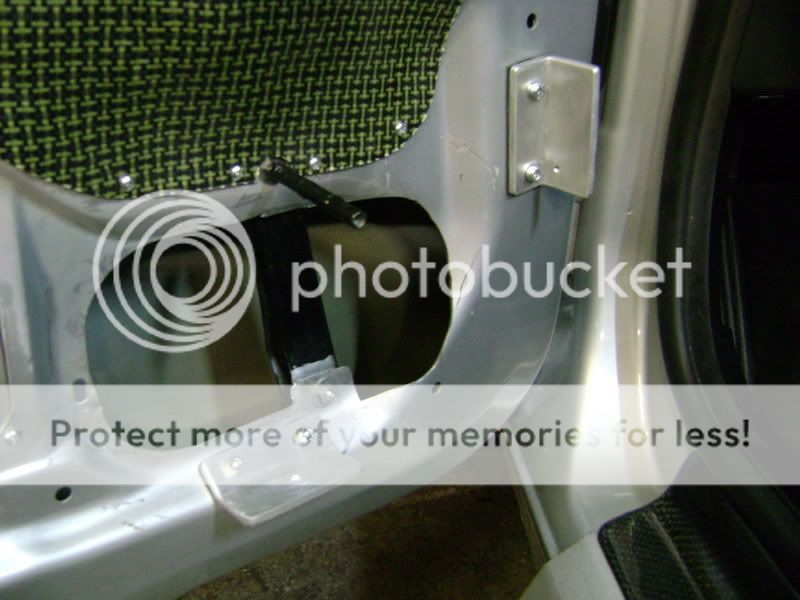
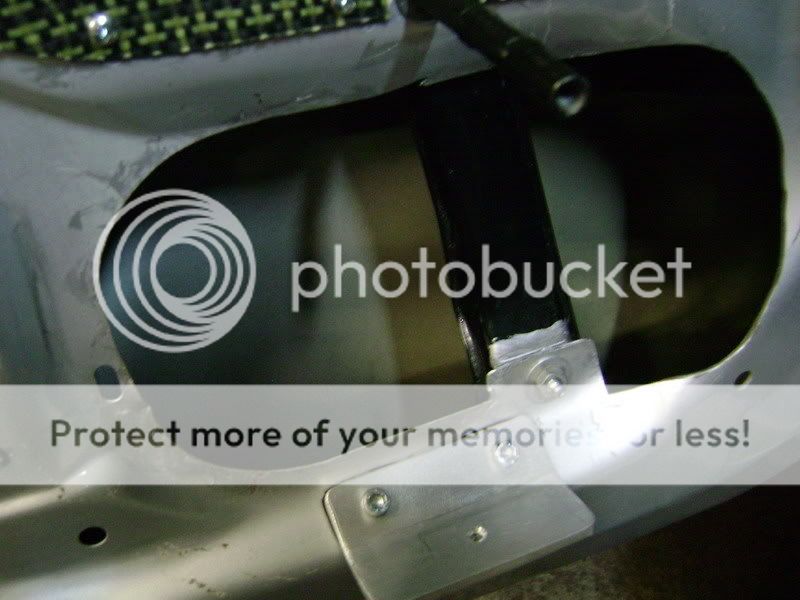
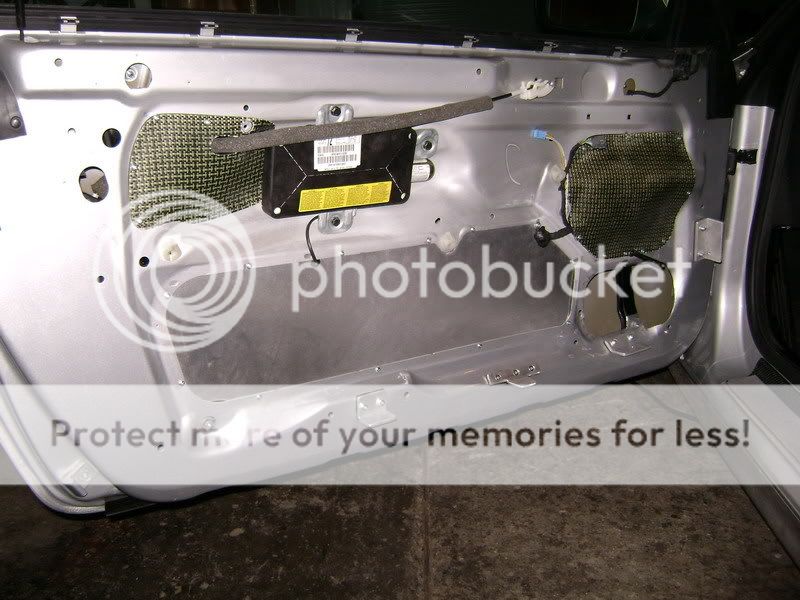
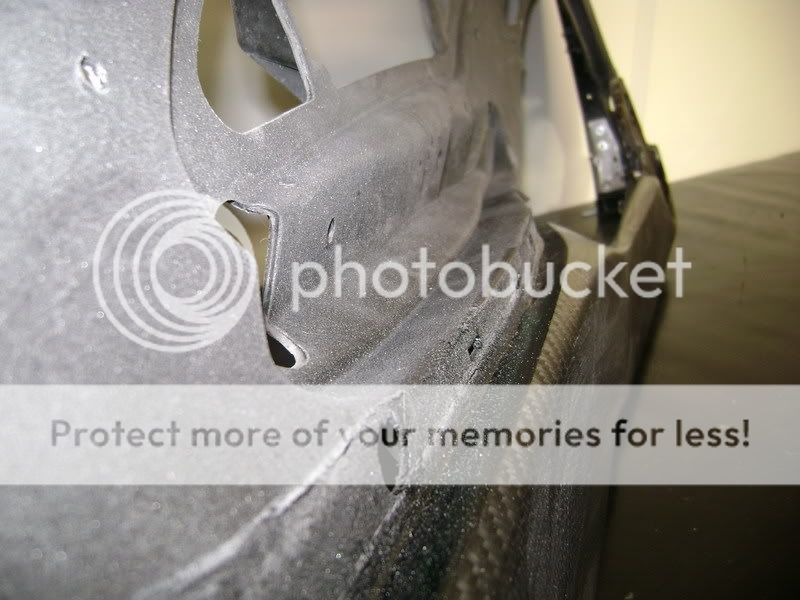
In the meanwhile I made a whole into the doors platework, behind the speaker.
You can see the windowglider. Just nog touching the speaker.
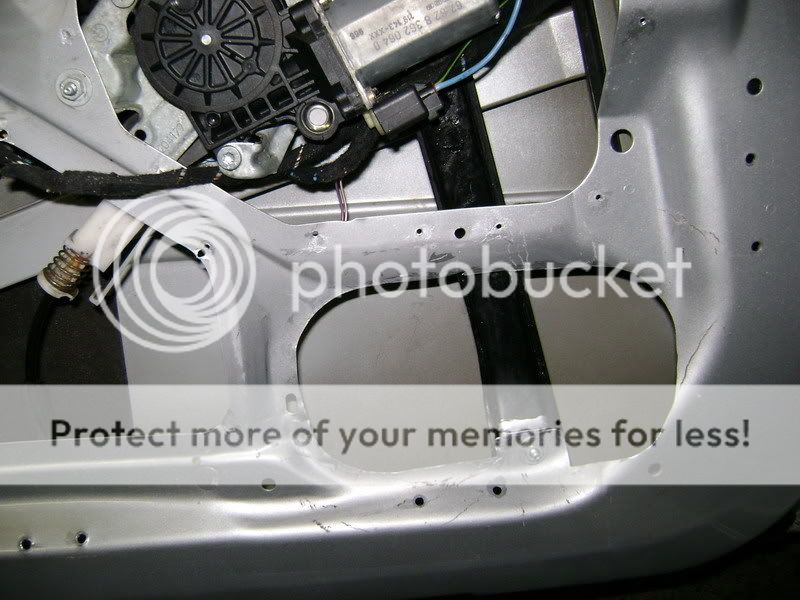
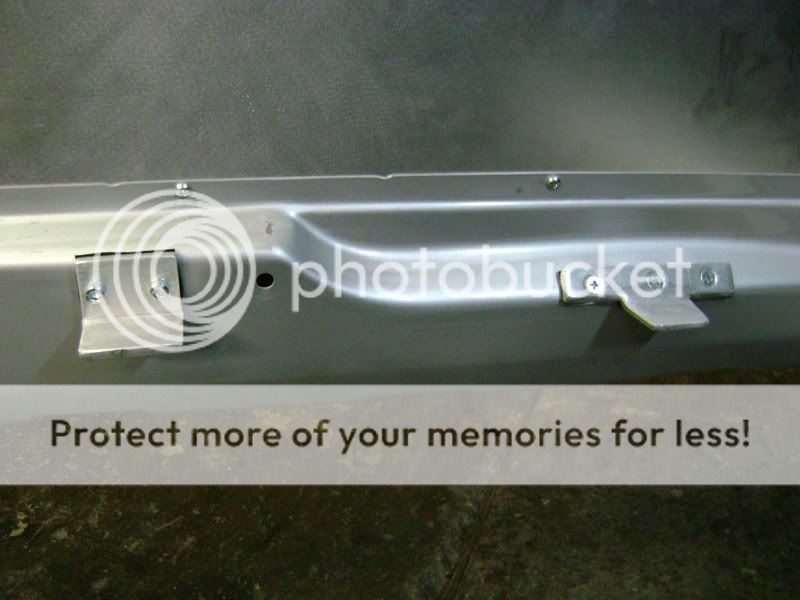
Made some more parts, to fill up the other wholes.
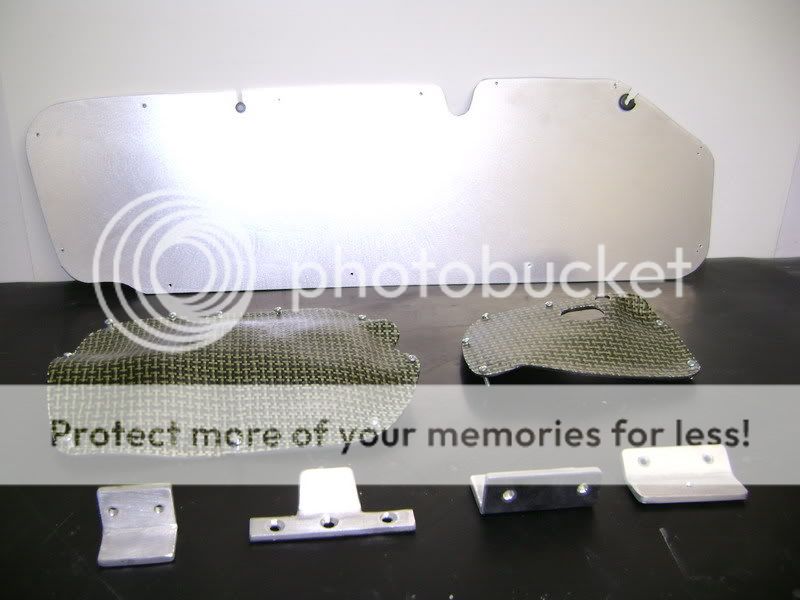
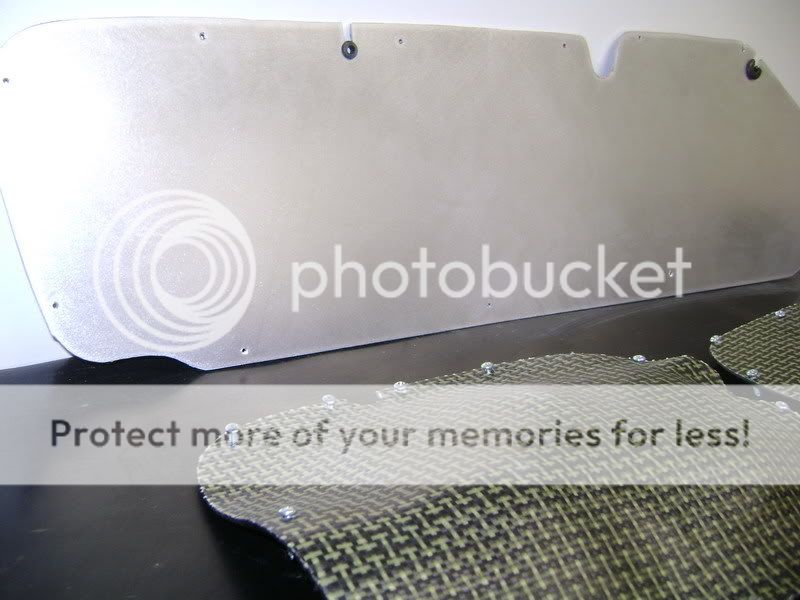
On the background, there's a alu plate of 4mm thick. Very hard and strong.
In the middle you can see 2 Carbonkevlar parts. I made em as thin als possible .
On the foreground you see 4 little rings I made, to screw the doorpanel extra tight.
If you look to the second on the right, there's a little rubber he pasted on. On the place where he screwed it. This to prevent resonance.
On the picture you see a little pole picking out. That's MEGA IMPORTANT.
Behind the speaker, there'll be another screw, so we can attach it even more in the middle.
Everything mounted:
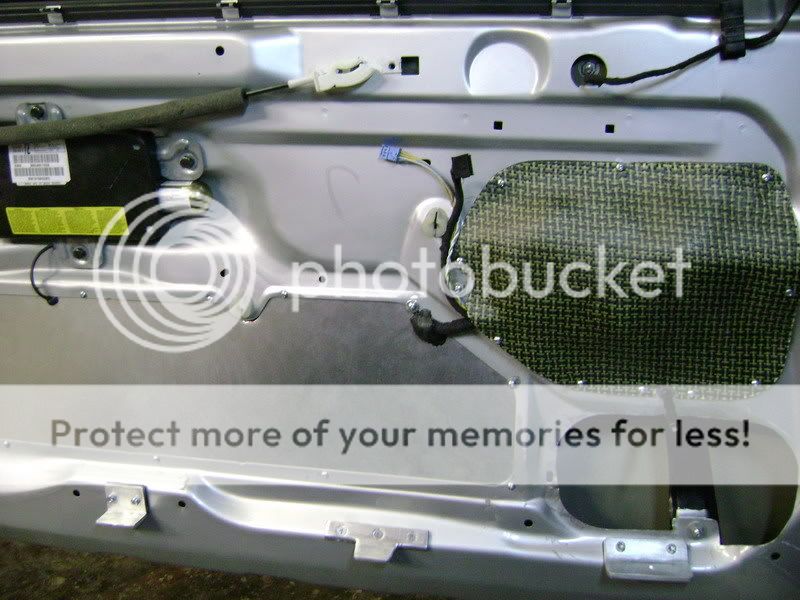
This won't be the end of the door. I has to make some tiny wholes airtight, but that won't go untill the has all the material to fill up the sound.
All I makes, will be filled up with this material. What exactly I going to use, he's not sure. we'ill keep u informed.
As you can see, I putting a lot of work into all this. And more work is coming up so the sound won't be lost...
I think this is a type of work, that is underestimated be many people. But the work will pay of in the end, that's what we are sure of...
|
|
|
|
|
03-09-10, 20:19
|
#23
|
Stage 2
Join Date: Sep 2010
Posts: 26
|
Re: BERYLLIUM BMW 323ci
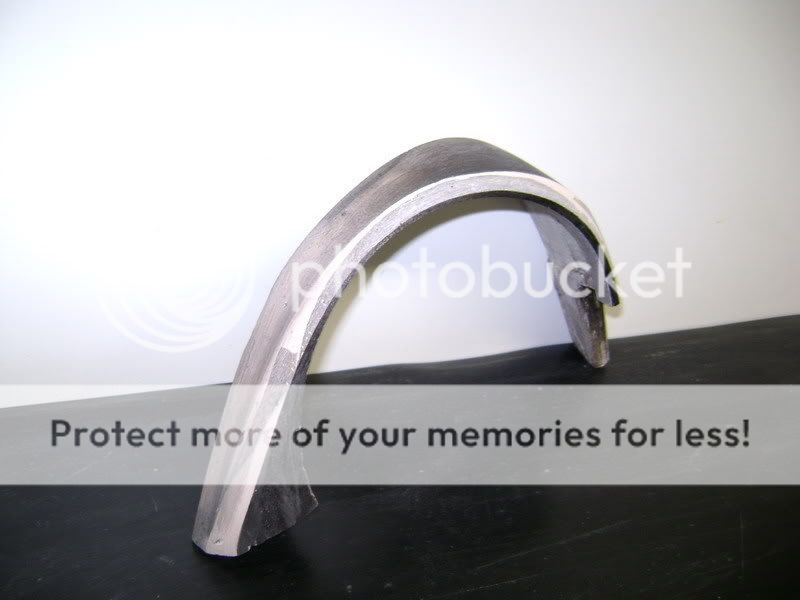
As you can see, het got the disc in there again. Disced a ditch in there so I gots some place to get the overflowingin leather away.
The alu and the pole I got on there so it all stays equal when it gets overlayed.
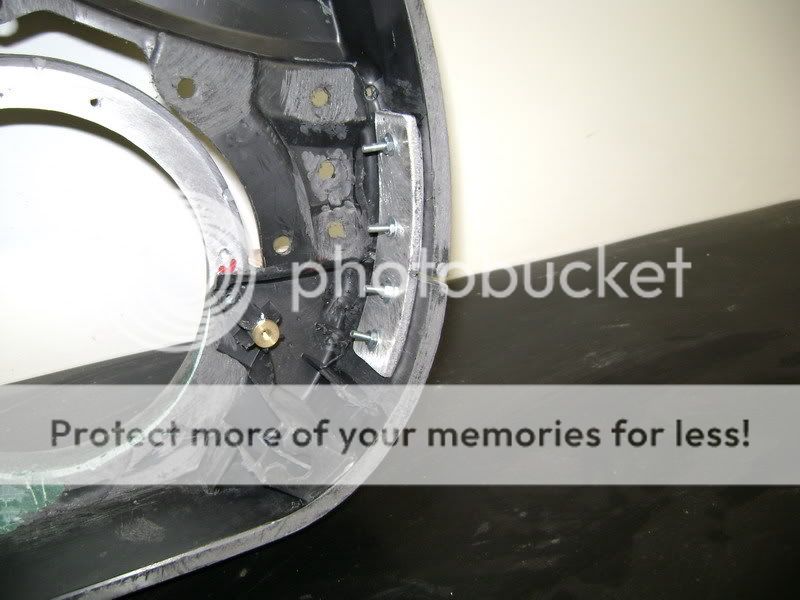
you see, the plates can be rattled off.
as you guys can see, the bottom part is already painted black, you all know what happens then...
indeed, CARBON TIME
|
|
|
|
|
03-09-10, 20:20
|
#24
|
Stage 2
Join Date: Sep 2010
Posts: 26
|
Re: BERYLLIUM BMW 323ci
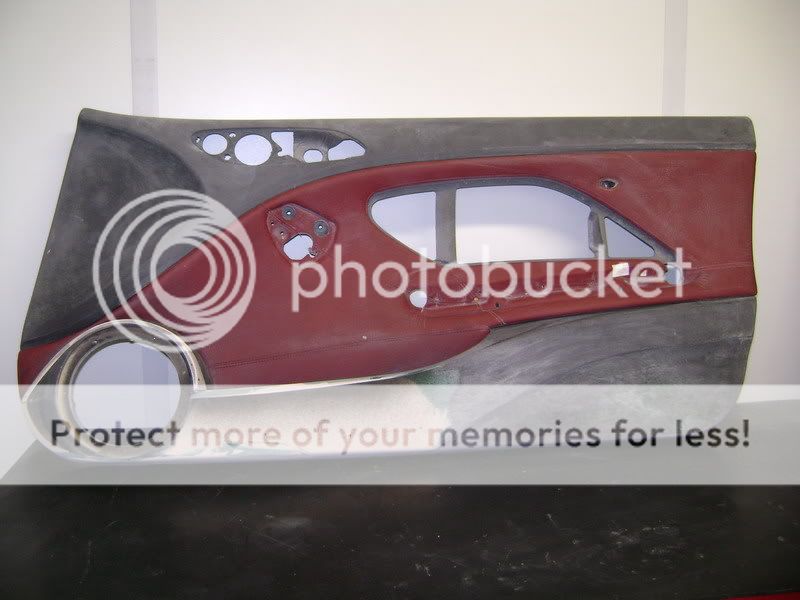
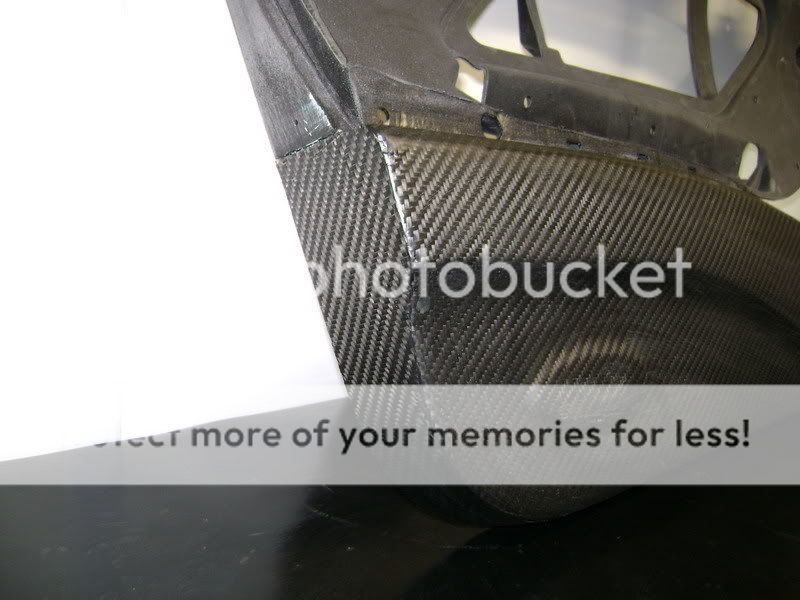
:drinks:The bottomsides of the doorpanels will have to be done in CARBON FIBRE.
So a dificcult object to get in the Carbon fibre. But we must admit, it's done nicely..
Many time was put into preparation the prevent the CF - overlay to got wrong at any place.
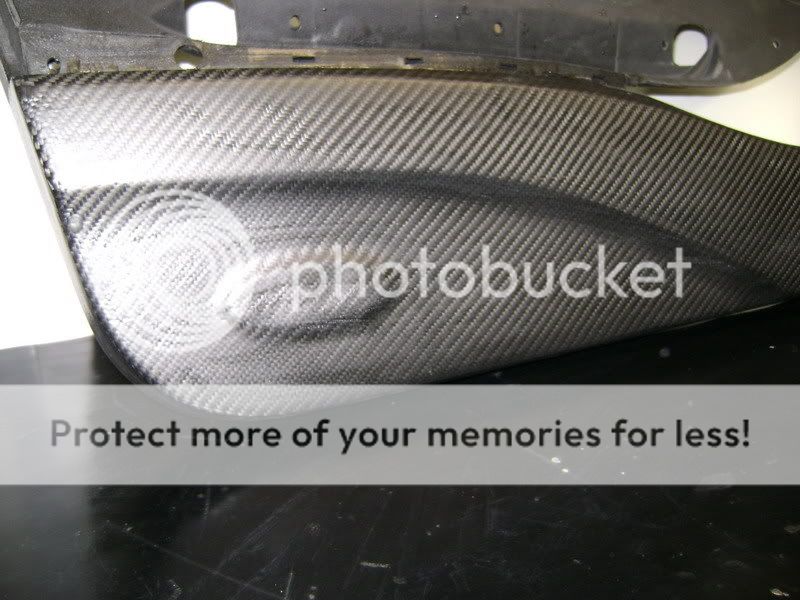
This annoying little side was one of the many things that could go wrong.
Also, I was satisfied to get the little lamp in there. makes the piece a bit more interesting then one big lumb piece.
This is the ditch I disced into the panel. For those who don't get the picture. When it's all done, the upperside of the panel will be overlayed in leather. Then I needs a little space the get rid of the too much leather.
To get a nicer finishing off
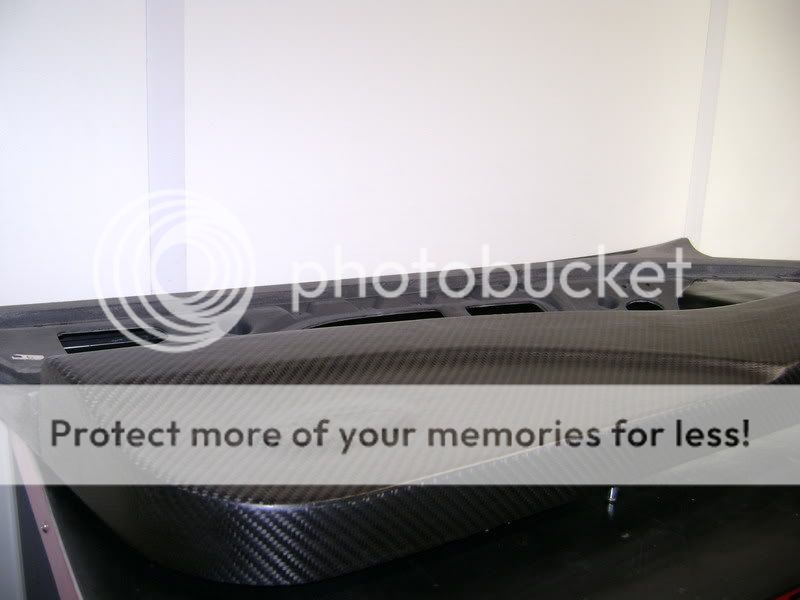
You see on this pic that everything at the bottom is in CF..
Now the big work is to get it all nice and flat. Put some more layers of epoxy on there till it's all nice and smooth.
so, lots of work and patience...
|
|
|
|
|
03-09-10, 20:20
|
#25
|
Stage 2
Join Date: Sep 2010
Posts: 26
|
Re: BERYLLIUM BMW 323ci
This is the 3th layer of epoxy.
Rubb it all down flat and equal everywhere, and then another 4th layer of epoxy.
Some pics

|
|
|
|
|
03-09-10, 20:20
|
#26
|
Stage 2
Join Date: Sep 2010
Posts: 26
|
Re: BERYLLIUM BMW 323ci
After firmly rubbin' the epoxy, I added another layer op expoxy.
Maybe it's not so visible on the pic, but it's quit flat already.
4th layer of epoxy.
Now it's important to rub the last layer good. Start with an 800 and end with a 2000.
I also found the same black leather to cover the panel like the original one.
|
|
|
|
|
03-09-10, 20:21
|
#27
|
Stage 2
Join Date: Sep 2010
Posts: 26
|
Re: BERYLLIUM BMW 323ci
A couple of years ago, my wife was making ( read: painting) christmasballes, to hang in the christmastree. She also hooked on making special things
When i looked at the plexy balls, i know, that sometime, i could use it for another project Well, ladies and gents, IT'S TIME
These are the plexy balls, you can buy 'm in every size. (according to his wife)..

A old friend of my Earl Zausmer build 12 or 13 years ago something like this.


Then I made a hole in the bigget bal, so the little one stands a bit 'in' it
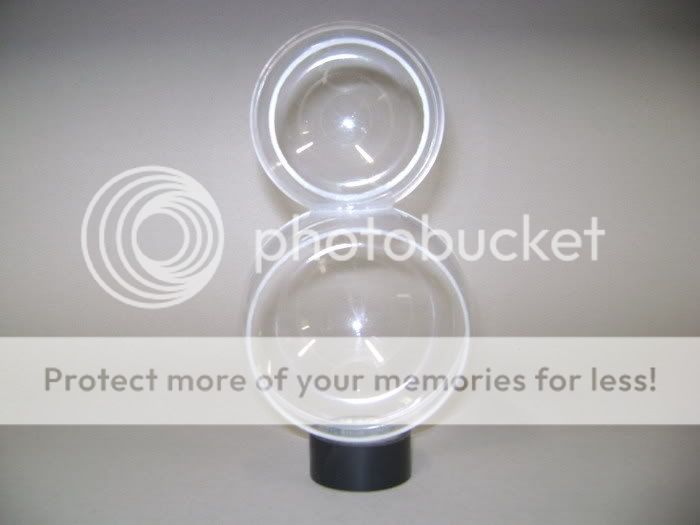
On this pic you can see the ball with the speaker, stands a bit further away. I did this on purpose.

pic with speakers in it.

|
|
|
|
|
03-09-10, 21:44
|
#28
|
 Stage 5
Join Date: Feb 2006
Posts: 849
Member of:
[Competitor CNCA]
|
Re: BERYLLIUM BMW 323ci
very nice,i use to read about this install on DIYMA 
|
|
|
|
|
04-09-10, 15:15
|
#30
|
Stage 5
Join Date: May 2004
Posts: 811
|
Re: BERYLLIUM BMW 323ci
Sir, all I have to say is... "Hats off!"
Four times judging EMMA Eurofinals Installation section, different categories from experienced to Expert... but only a very few installs I saw at this level. First I thought you are using high-tech CNC machines... like most do... but just found myself with a large smile of admiration... passing through the 89 posted pages of your amazing project.
It is a great honor for me at least to see this project also on a Romanian forum.
All my admiration!
__________________
Pure Music
"The myth is stronger than the truth,
And the truth can sometimes lie
To see all from what it was
You need an uncorrupted eye..."
ionutmocioiu-on-facebook.com
|
|
|
|
|
|